Sunny spring mornings turn sour if you don’t start your paving project correctly. Taking care of business means checking off an important list before taking off from yesterd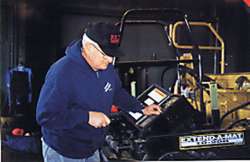 ay’s beautifully formed joint.
While most contractors know the basic steps for getting the paver started each day, there are some instructions that are easy to gloss over. When you’re in a hurry, it’s easy to forget the importance of checking the crown or jogging the tow point cylinder. But the contractors who take pride in their work know a refresher course helps bring that checklist back to mind.
Begin each day with careful inspection Don’t be afraid to get your clothes dirty. You should start each day by checking out your paver and screed, and that means getting down on your hands and knees really looking at the machine.
When you do the walk-around, look for basics make sure your tractor’s full of fuel, make sure the hydraulic oil is full and start the engine to warm it up.
Check out the screed: The hot iron that gives us the mat quality we’re looking for when paving has to be in the right condition. While you’re down there at eye-level with the bugs, check to see if there are a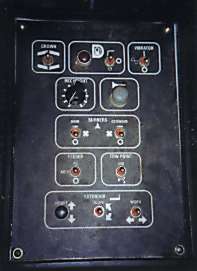 ny holes or warped areas in the screed. Check it out with a straight edge, horizontally and vertically. Once you’re satisfied that everything’s straight, check out the crown of the screed. Your manufacturer may recommend a crown of 0.0625 inches (1.6 mm) in the middle, but refer to the manual. Make sure the front end of the screed is okay, then check the back end and set your crown according to the manufacturer’s suggestion.
Now take a look at the extensions. Check the height of the adjustable extension to be sure both sides are even. Imagine a water skier coming up out of a lake on an evenly angled set of skis. That’s the image you should have for your screed. If both skis are not angled evenly, the skier ends up in a mess. If both screeds are not at the same angle, you get a tear in the mat. Other areas could be affected as well. Next, check out the slope of the extension. Whether the slope is positive or negative, bring the slope to about 9 o’clock so it’s parallel with the main screed. If it’s down too low, it’ll drag. If it’s up too high, too much material gets under it.
Take a look at the pre-strikeoff. This is a permane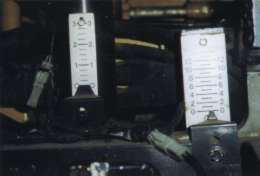 nt fixture, but could be mobile on some pavers. Make sure it’s adjusted properly according to the manufacturer’s suggestion. Whether the screed extension is front-mounted or back, adjust the pre-strikeoff as part of your morning routine. Neglecting the prestrikeoff is where some operators fail. After the first checks and adjustments in the morning, you still have to keep track of its height. If you go the exact same speed all day, if you pave the exact same width all day, if you pave the exact same thickness all day, just one adjustment in the morning is acceptable. But the following actions will require you to check the pre-strikeoff periodically:
_ sliding the extension in or out,
_ Speeding up or slowing down the paver, and
_ temperature changes.
The final checks before taking off include testing the augers. Make sure they’re going to turn and the feed sensors are going to work properly.
 Beware of fluff
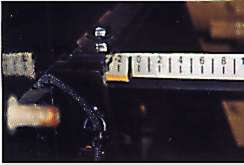
Before you take off, remember the fluff. It may not sound like a major problem, but ignoring it will ruin your day in no time. The fluff factor is the extra depth today’s mat will need in order to be compacted to last night’s mat thickness. If the joint you completed yesterday is 1 inch (25 mm), you’ll want to lay 1.25 inches (31.8 mm) of mat thickness prior to rolling today. That’s factoring in the fluff. To make that additional 0.25 inches (6.4 mm) happen, contractors should remember to use their starter plates (See Figure 1, below).
Don’t fall into the trap of believing you can adjust the screed to accommodate the fluff factor as you take off from the joint. Place the starter plates on the existing mat half way between the crown of the screed and the end gate. Back up the heated screed and paver, and check to be sure it’s running at the full RPM of the engine. If you’ve got the paver at operating speed, you’ll have the right voltage and the right hydraulic fluid levels running through the system. Set the preheated screed down on the starter plates.
Next, have the operator pull the paver ahead a bit so the tow arms come in contact with the tow point cylinders. This will eliminate looseness between the tow arm and tractor. If there’s any slack in there, you’ll get a jerking motion when the paver takes off and that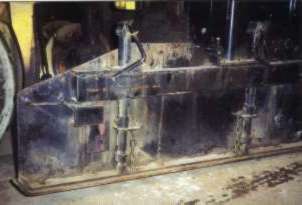 could cause a bump in the mat. At this stage, you want everything tight.
Check your tow point cylinder carefully. Jog the cylinder up all the way, then down all the way, then back to the center. This will ensure the cylinder isn’t airbound which could be another recipe for “bumping” the mat.
Null out your screed next and set your angle of attack. Check your edger plates. Are they just barely touching the existing mat? If you’ve adjusted the spring-loaded edger plates so material doesn’t bleed underneath them, they will continue to monitor themselves as you pave. If you don’t have spring-loaded edger plates, remember to keep an eye on them as you lay your pavement. Don’t let too much material get out from under them.
Before taking off, check out the flow gates in the hopper. Set them at the proper height to keep the right head of material moving in the augers. Check the feed control sensors at the end gate to make sure they’re at the proper height to speed up or slow down the material. How about the augers? Are they at the correct height for the type of mix you’ll be laying?
Turn the electronic switch on. Now set up your grade and slope. Once you get going, you’ll put the switch into motion-only mode.
 Get ready to go
Now you’re ready to back the first truck in and fill the hopper. Turn on the conveyors and charge the system. Charge the augers and get the mix back to the screed, but be cautious not to overcharge the system. That will cause your head of material to fluctuate. Also, if you put strain on the screed with an overcharged system, you’ll encourage the screed to climb over the huge head of material.
Pay attention to the head of material. Get a shovel in there near the augers if you see the material getting too high. Get the material out to the end gates. Now you’re ready to go. With both crew members on the ends of the screed, give your operator the thumbs-up and the paver will take off slowly, gingerly. Drive off of the starter plates and proceed at a speed of about 5 or 6 feet (1.5 or 1.8 m) per minute. Don’t wait too long to look back. Get back there and check your slope. Check the crown. Take a straight edge and make sure you just took off from the joint smoothly. Make sure you have the correct fluff factor. Check the transverse joint now and again as soon as it’s rolled. If there’s a problem, it’ll be easier to fix now than later. Make any necessary adjustments now for the take-off joint.
If you’ve gone through all the steps outlined here first, you probably don’t have any adjust-ments to make to the take-off joint. You’re good to pave. But you have to pay attention to the details. If you remember all the little steps involved in getting that joint and mat just right, you’ll have a 99.9 percent chance of taking off properly with just a 10- or 15-minute time investment. Planning this set up time into your morning routine can make the difference between a nightmare and a sunny spring day in paradise.
